New Dual Loop Build


Over the holiday break, I took a night to rebuild my computer. My previous build was actually pretty fresh, with a Ryzen 7 1800x and 32GB of ram, but the older R9 290 cards weren't pulling their weight in a gaming build pushing two 4k screens.
I decided to upgrade to two GTX 1080 Ti's. I felt sad to tear down such a fresh loop, but it had to be done.
New Parts
I went with two Duke 1080 Ti's from MSI and decided I'd use EKWB for my new cooling parts. I decided to go with separate loops for CPU and GPU, and bought fresh radiators, pumps, and reservoirs from EKWB. I also bought some soft tubing and fittings to go with it.
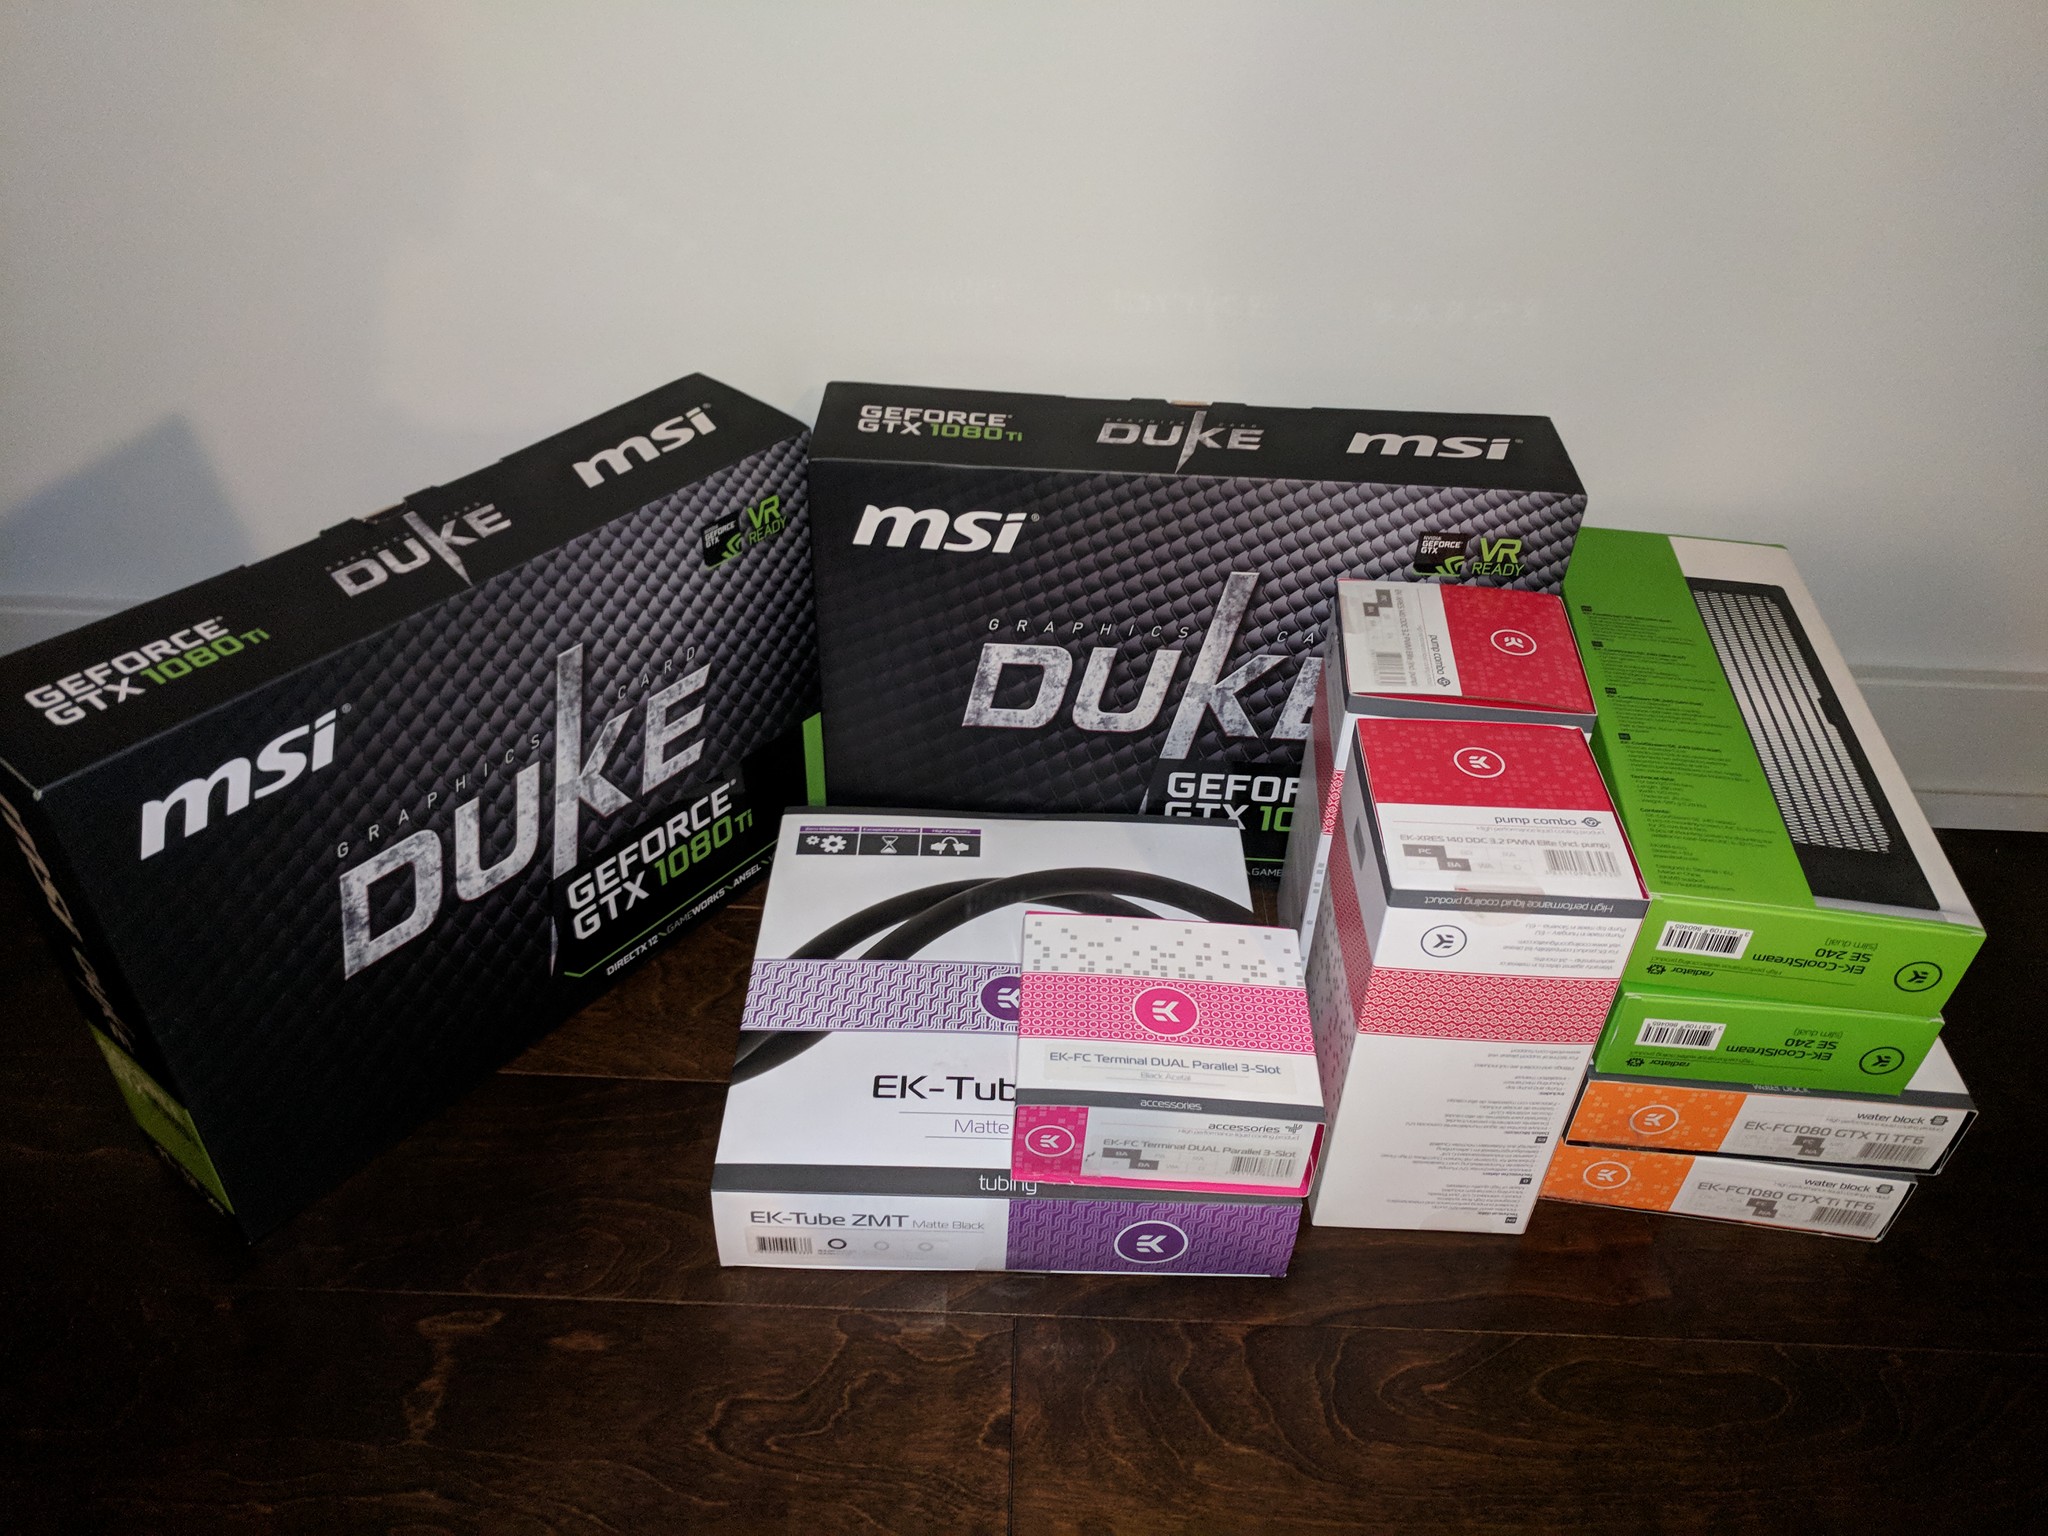
I had left over PETG from XSPC and a ton of extra fittings, both XSPC and Thermaltake. In addition, I had some which I re-used from the previous build.
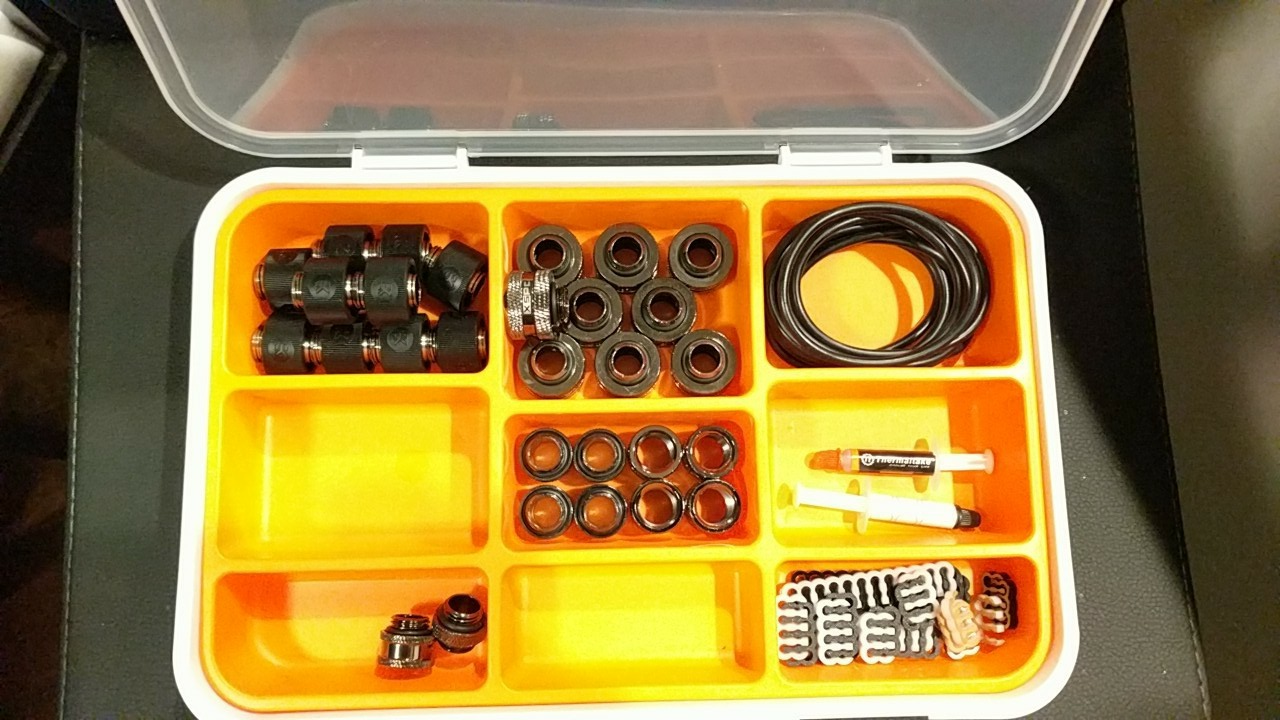
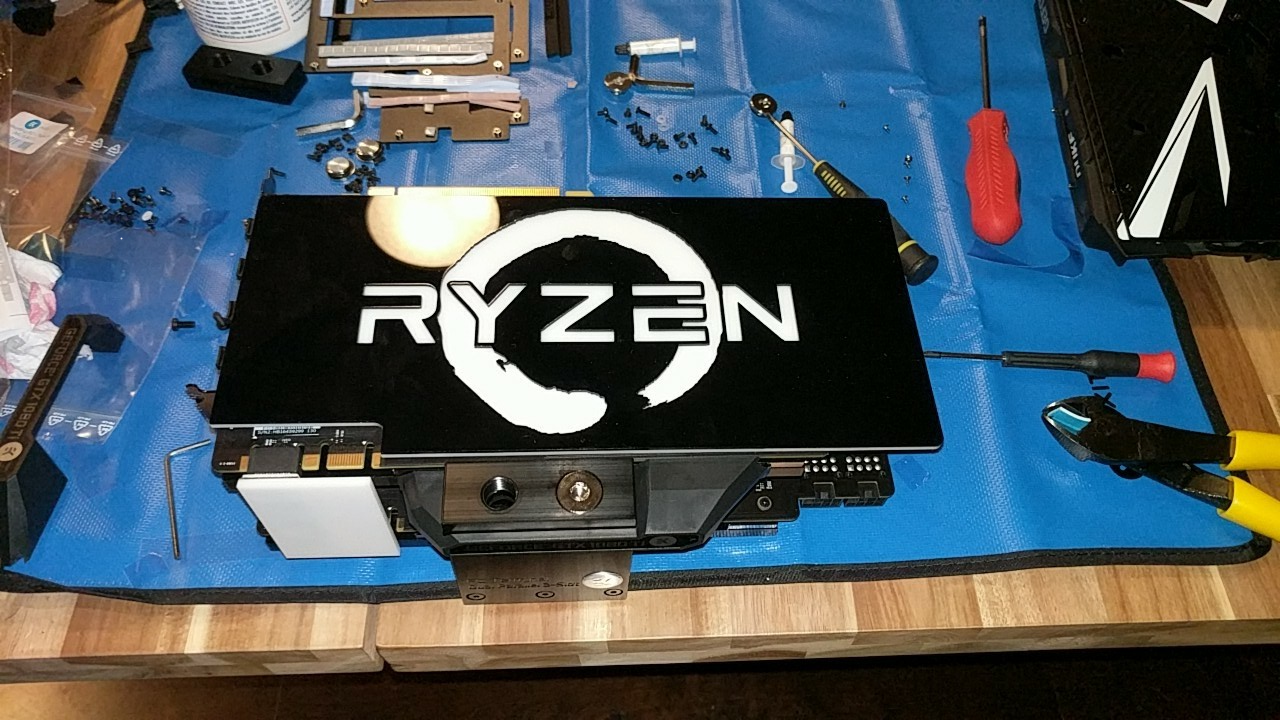
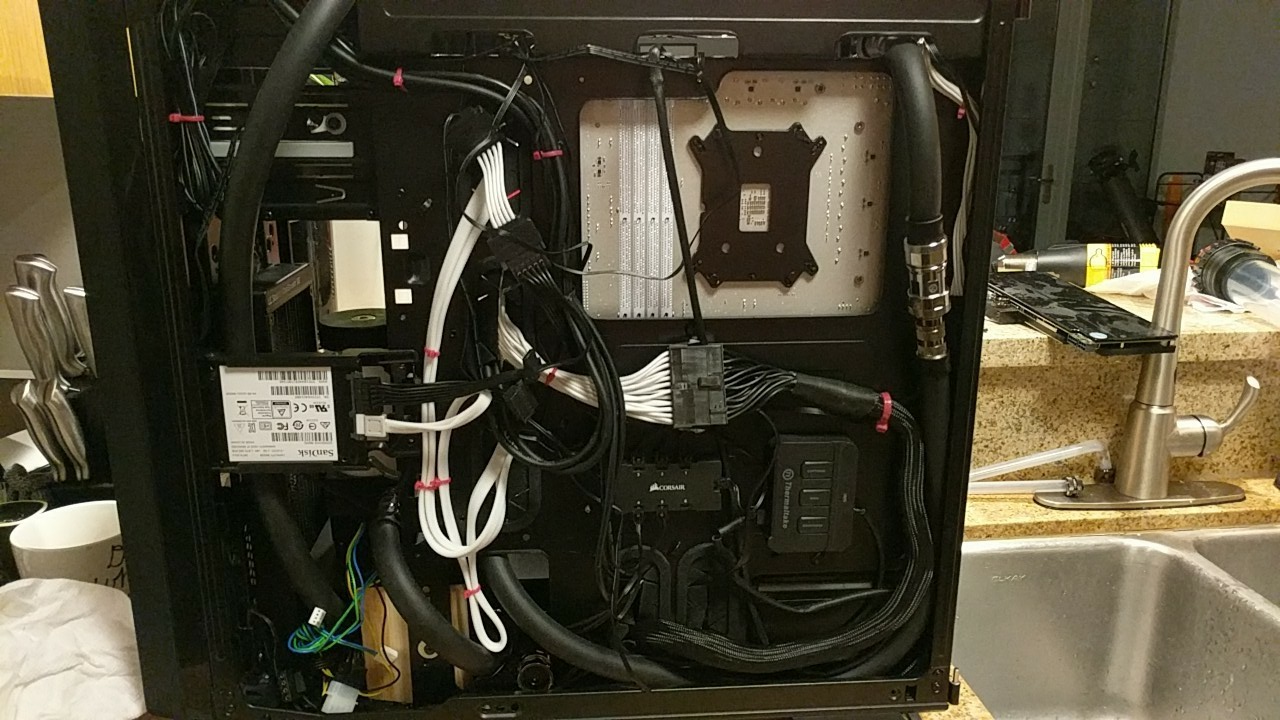
You might also have noticed the cable combs. Those, with the addition of a custom Ryzen GPU backplate, a custom PSU shroud for my Corsair 760T case, and a white SLI bridge were purchased from V1 Tech.
V1 Tech Thoughts
I'd never heard of them until I started Googling to see if anyone had a shroud for my case. They have some cool stuff, but the quality isn't really up to par. Their GPU backplate was supposed to be affixed to the existing screws with adhesive magnets. As you can imagine, if those magnets slip, they'll easily short and destroy components unless you have a metal backplate underneath; but I did not. I didn't purchase an EKWB backplate, because I was given no reason to believe that I would need it. The original backplates weren't compatible with the EKWB blocks, either.
In addition, the PSU shroud was marketed as "long enough to cover the entire bottom, with just enough room for fans and a radiator". However, even with the slimmest rad I could find, I had to chop a few centimeters off of the shroud with my dremel. It's made of acrylic, and you cannot begin to imagine how messy the aftermath was. I was covered in a fine black dust for days. The shroud was also quite flimsy, and I ended up cutting out a small wood block to hold up the dangling corner.
Overall Specs
With the new and old parts mingled, the system was rocking:
- Ryzen 7 1800x
- MSI X370 POWER GAMING TITANIUM Motherboard (great fuck, could that name be longer?)
- Corsair Dominator Platinum RAM 8GB 4x (32GB Total)
- MSI Duke GTX 1080 Ti 2x
- SanDisk 960GB SSD
- Western Digital 1TB 7600 RPM HDD
- 5x Corsair HD120 RGB Fans
- Corsair 760T Case
- Misc EKWB, XSPC, and Thermaltake water cooling parts
Plans
The plan was for two separate cooling loops: one GPU, one CPU. I wanted to keep the scheme clean with allowance for RGB to dictate the mood, so I opted to keep to my previous black and white theme. This meant pastel white fluid in one loop, matte black in the other, and cables to match.
I've been working with hardline tube for a couple builds now, so I'm no stranger to it. It can be incredibly tedious, hard to maintain, and impossible to drain, flush, or modify. With lessons learned from the pain of previous builds, I decided to give each loop a mullet: business up front, party in the back. Using hardline in the visible areas of the build allowed me to keep the unrivaled aesthetic, and using soft tube under the shroud and in the back of the case made the build easier and allowed me to easily add Thermaltake quick connect values for easy draining and upgrades.
I thought it would look cool to have the reservoirs affixed to the shroud. I wanted to have a short hardline come from each res and connect to a port on the surface of the shroud, which would have looked amazing, but some required parts didn't arrive on time and I wanted to move forward.
With each loop, I decided to use a 240x120x28mm radiator with two RGB fans.
finally, there are the random aesthetic details such cable combs, the themed backplate, and so on.
The Build
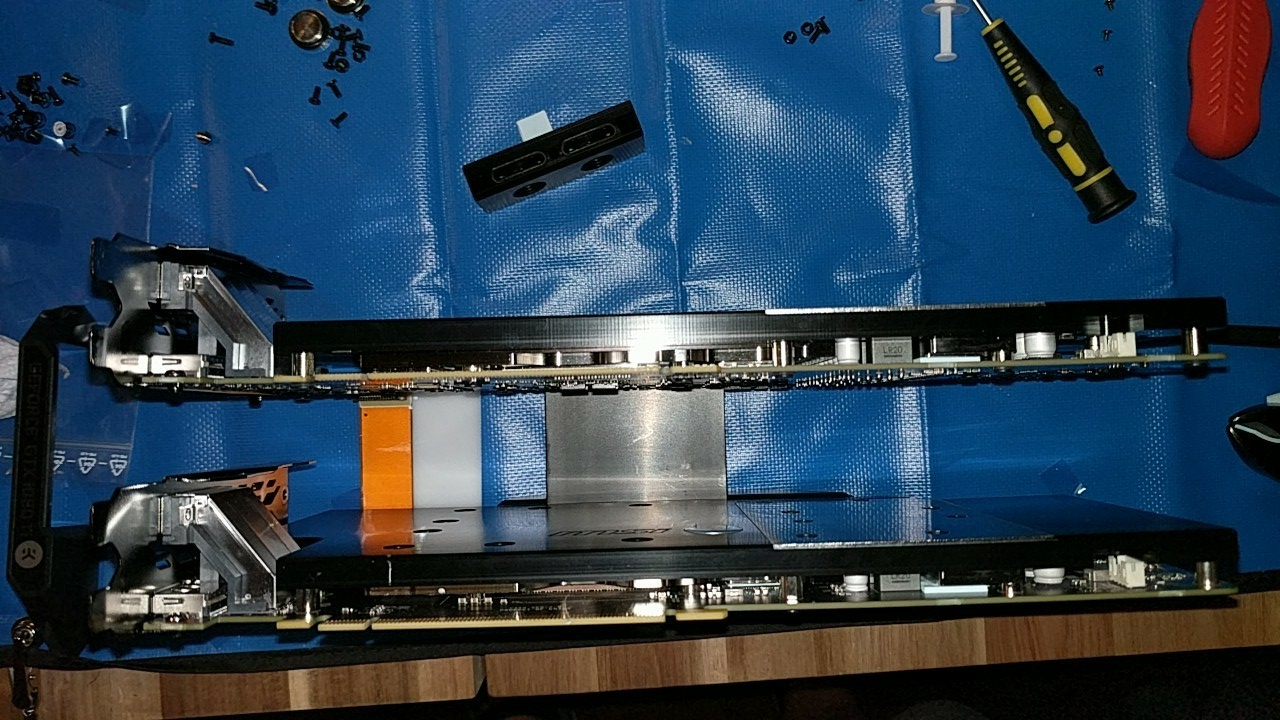
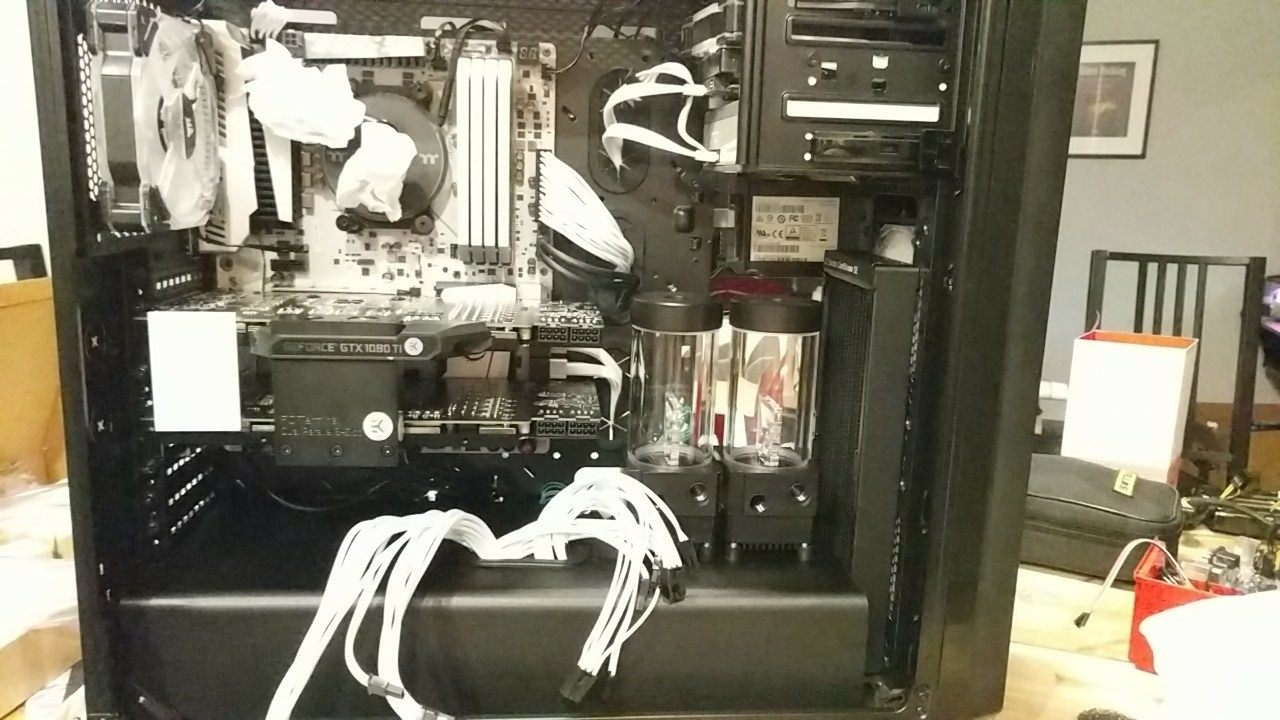
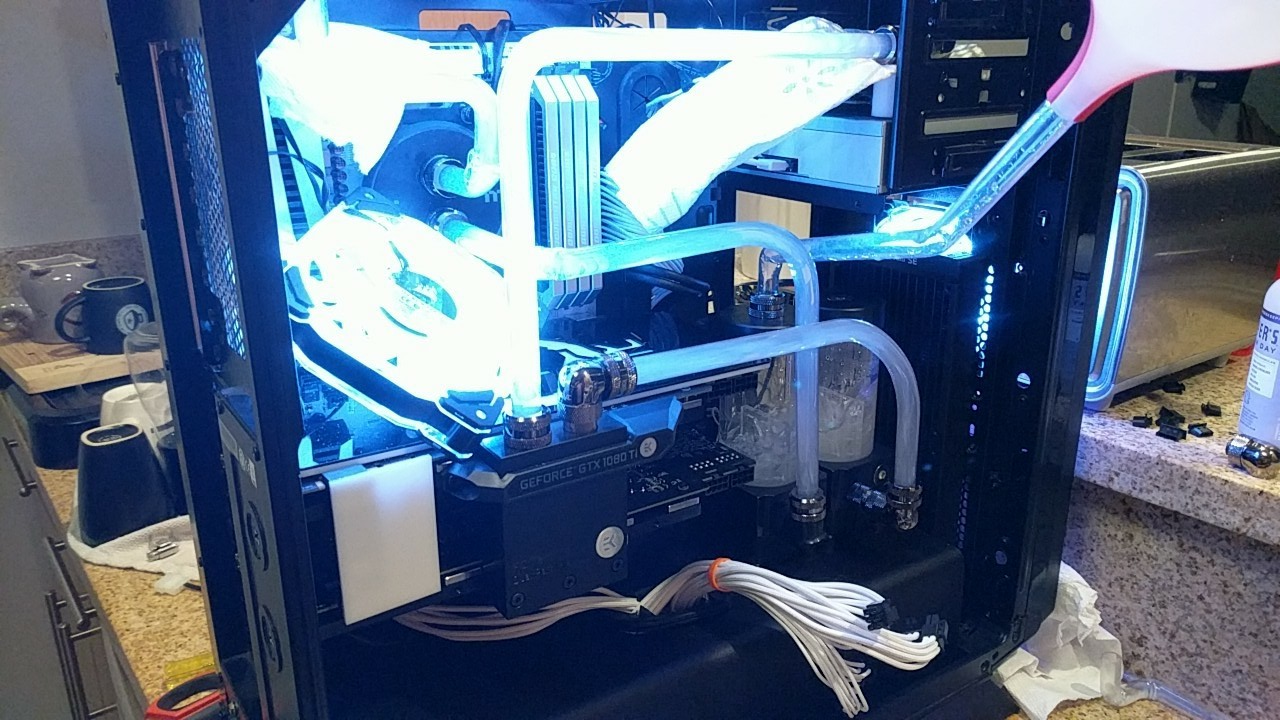
I started by assembling the GPUs and their blocks, as well as attaching the cooling bridge, plugging in the SLI bridge, and placing the backplate to get an idea of looks.
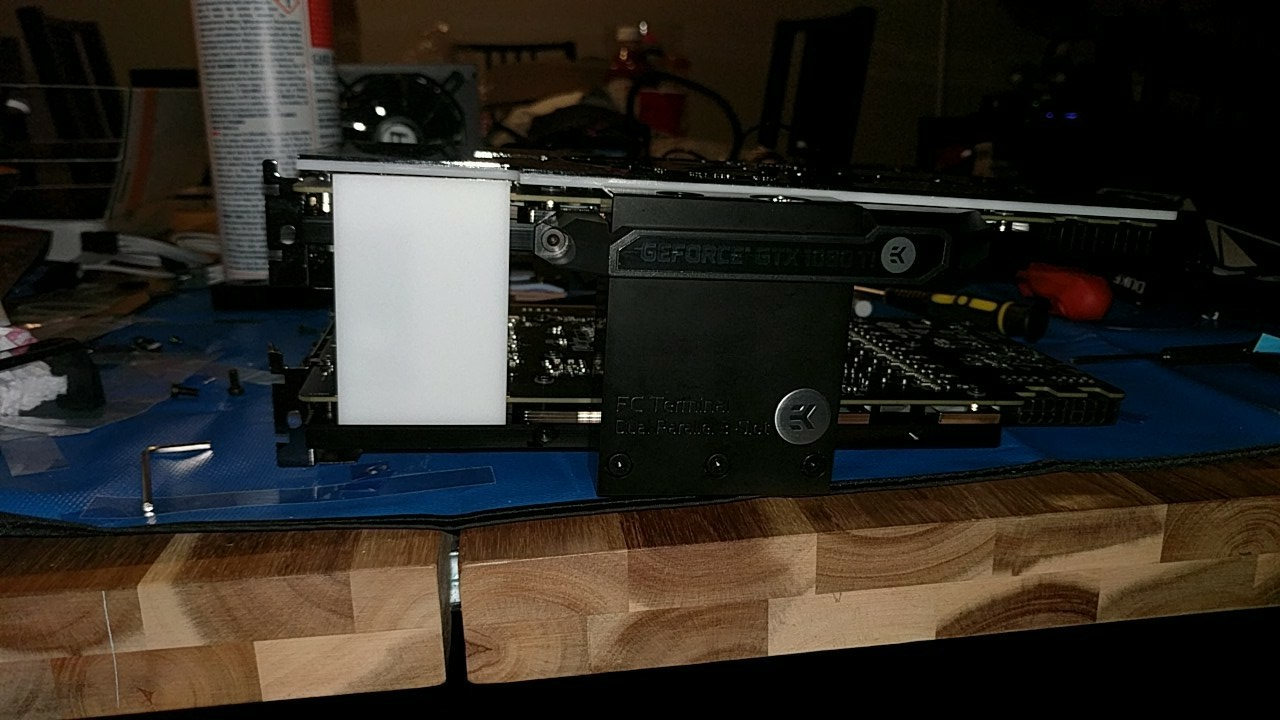
After mounting the fans and rads, I started laying out the soft tubing which would go beneath the shroud. This is for the GPU loop, with a rad inlet, rad outlet, and a branch for a quick connect fitting.
Tubing Mishap
During my 4 am purchasing spree, I failed to buy matching tube and fittings. I thought I could work around this by affixing hose from Home Depot to the inner part of the EKWB fittings using hose clamps. This actually went terribly wrong, leaked everywhere, and forced me to do a rebuild. I ended up managing to shave the ends of the too-large hose to fit inside of the too-small compression fittings. This is why some images have clear tubing and some have black tubing.
Next, I fit the shroud, which took a lot of measuring and cutting.
Then I slotted the cards so I could measure the spacing for each res.
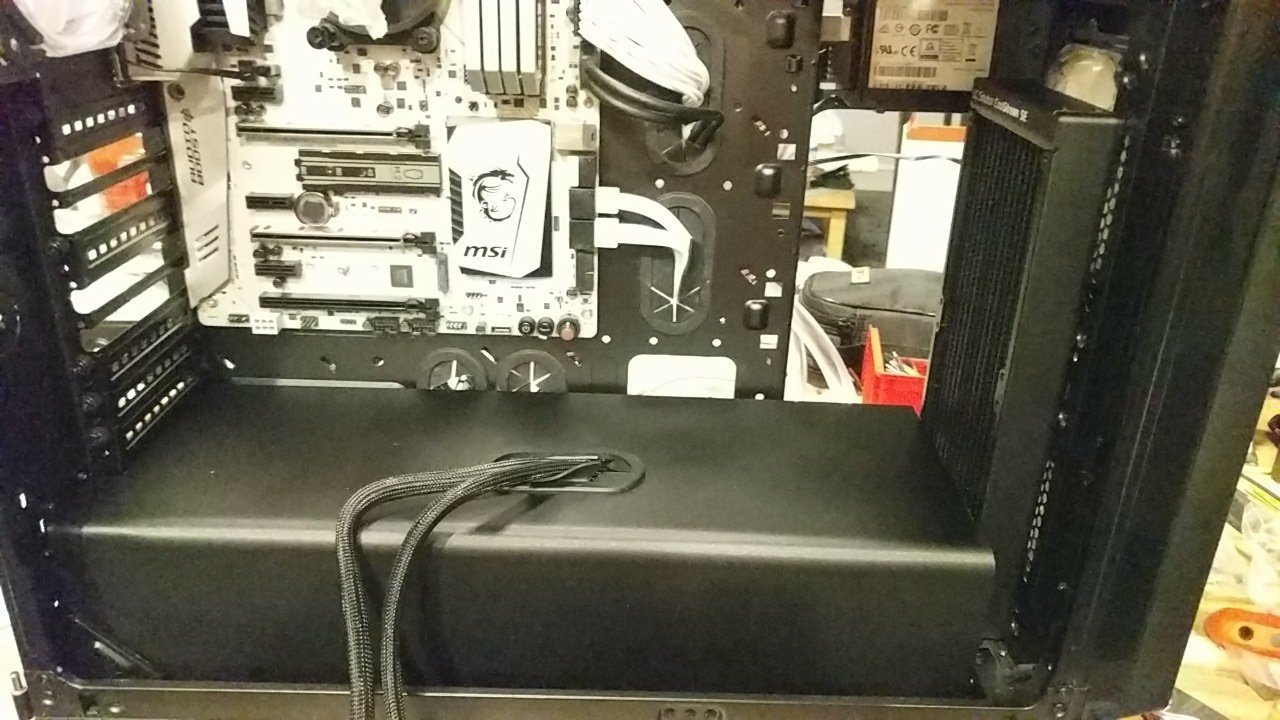
With measurements in hand, I drilled some mounting holes and attached each res. They shroud was thicket than I expected and very fragile, so the thread on the screws probably only had one or two bites.
I then hit the point of no return. Once the GPU res was attached to the under loop, there was no moving or removing the shroud, or accessing the under loop itself. This came back to bite me hard when everything leaked on my first test, and I had to completely undo all of the hardline to remove the shroud and replace the tube.
With no idea of the impending doom, I happily carried on with my hardline. I have become attracted to wide-diameter bends, so I incorporated some, and they turned out great! Next time, I'll find something round to use as a guide instead of eyeballing it; this would help with both perfect roundness and diameter consistency.
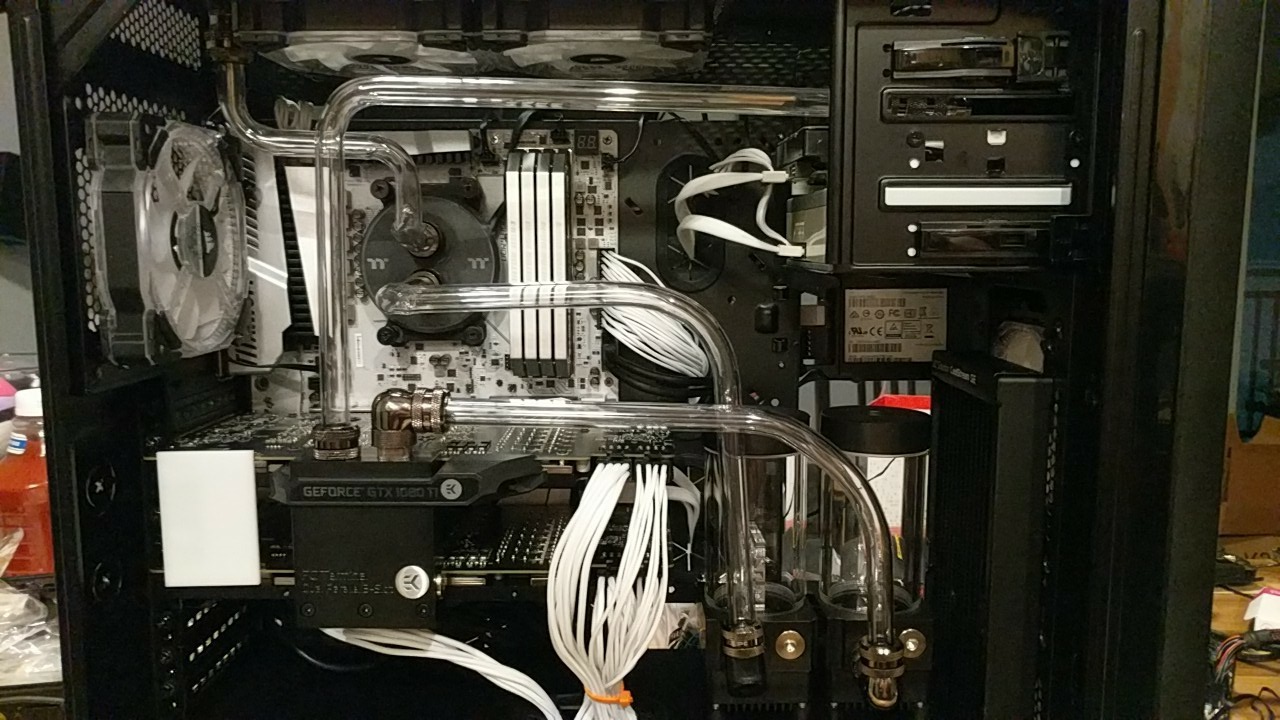
You can actually see a bit of roughness in the outermost bend, but a much cleaner one on the bend directly behind. This is indicative of the order in which each bend was done. Next time I drain the loop, I'll likely redo both of these lines: the outer to clean up the bend, and the inner to remove the slight slope. If this build hadn't taken from 6 pm to 7 am, I would have done it initially.
The hardest bend was the tribend on the CPU-to-rad line, and I'm quite proud to have nailed it on my first try.
I attached the hardline to the hidden soft tube, leak tested, instantly soaked everything, nearly threw the entire damn thing off my 4th story balcony, troubleshot, and rebuilt. Then I leak tested again (using distilled water), starting with the GPU loop.
I found a small leak in the drive cage where the hardline and soft tube mate. I fixed it, placed a paper towel to check for more leakage, and continued the test.
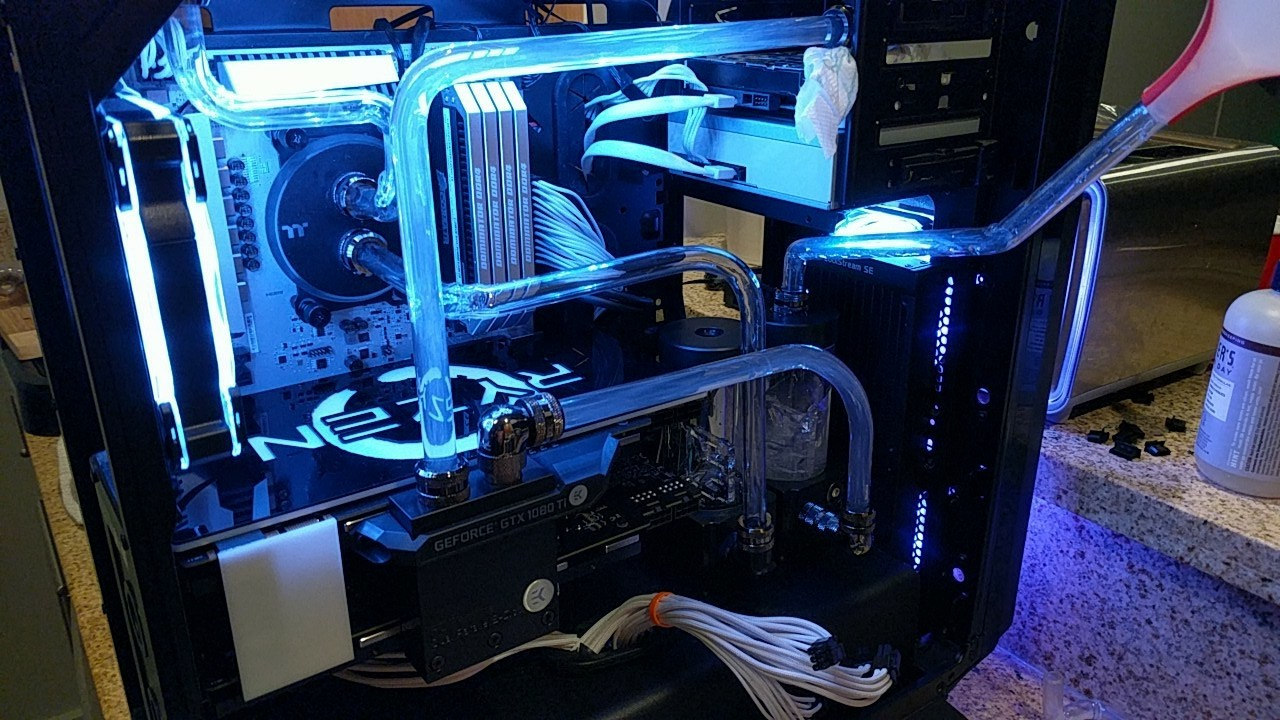
I was quite paranoid about leaks at this point, so I let this run for about an hour. During that time, I mixed my coolant, took a short break, and took some pictures of the rear loop.
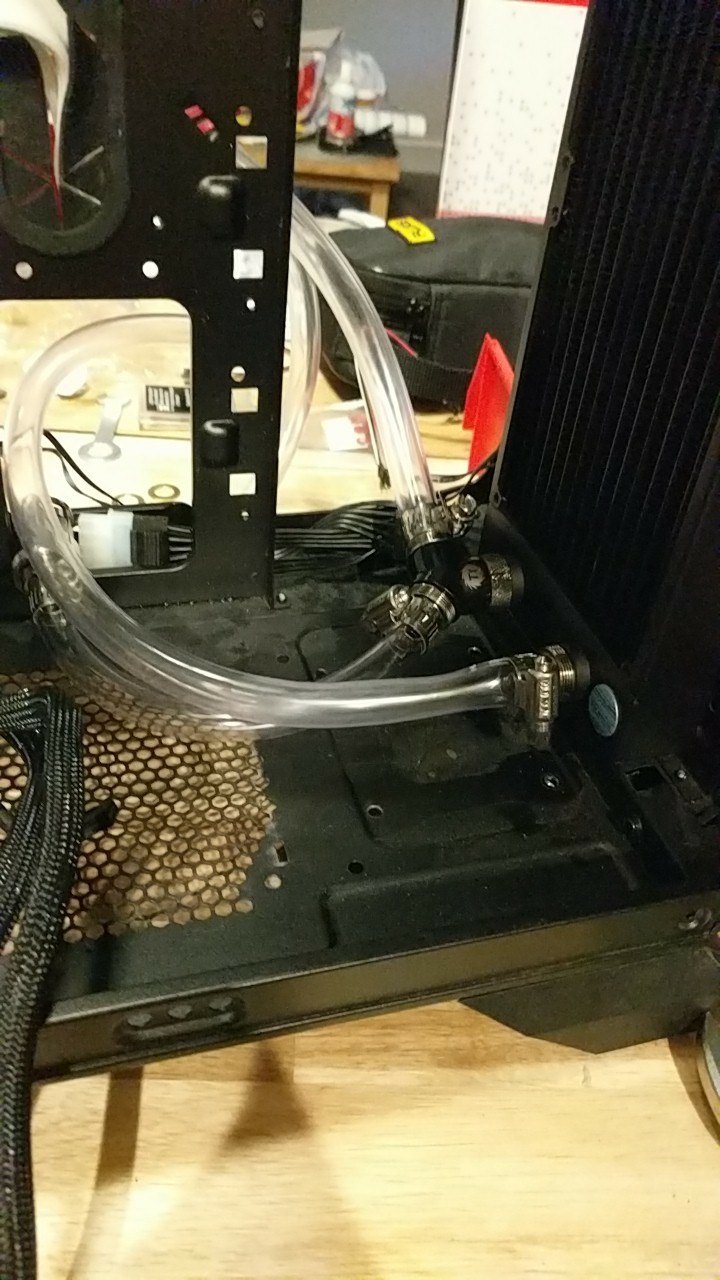
You can see that the CPU loop is segmented with a quick connect at the middle right, as well as the quick connect drain for the GPU loop at the bottom, just to the right of the wooden support.
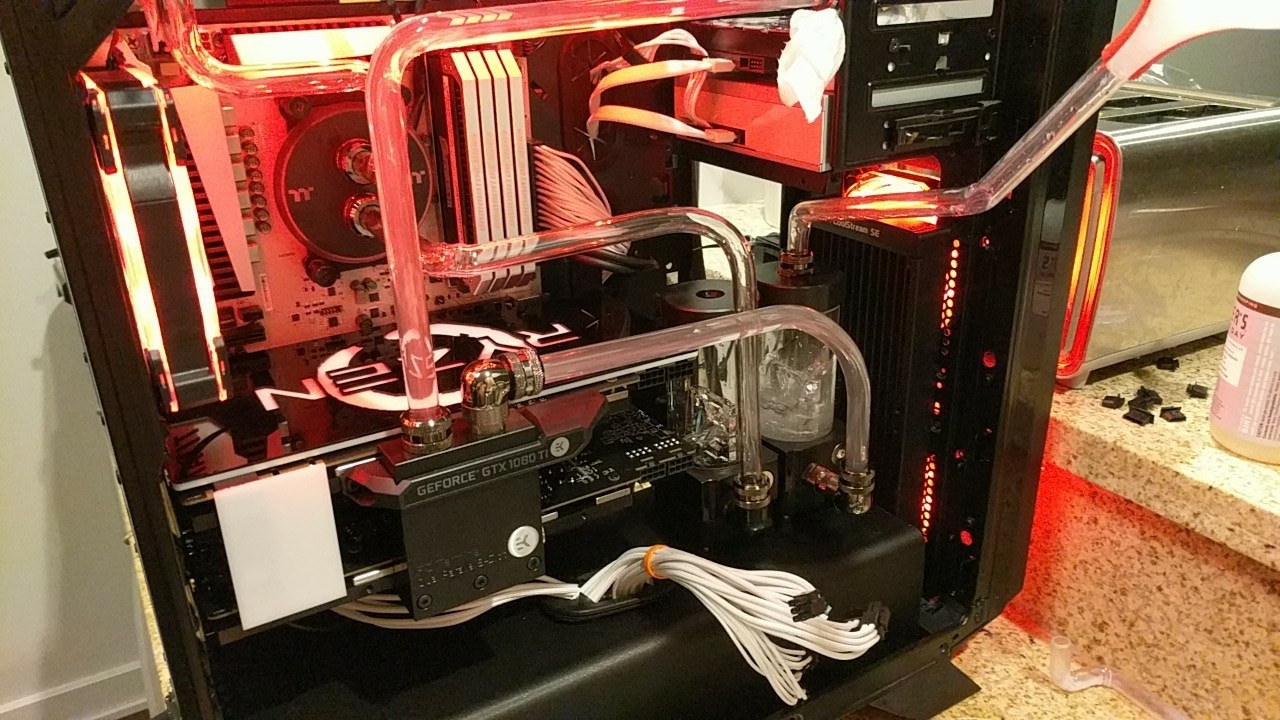
I then proceeded to do a leak test on the CPU loop. After the success of the GPU loop, my paranoia waned, driving the test time to about 15 minutes. The removed fan is indicative of just how challenging it was to connect the soft tube to the top rad in such a small space.
With both loops leak tested I was able to fill the loops with their final coolant.
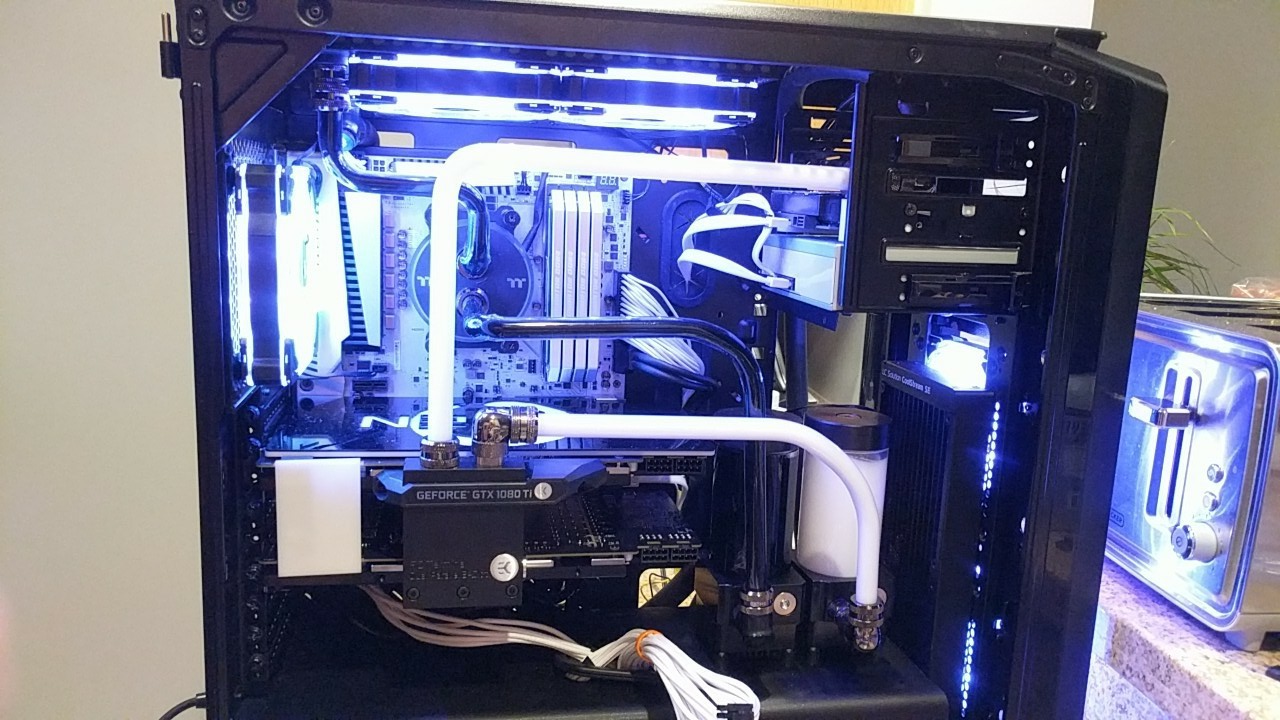
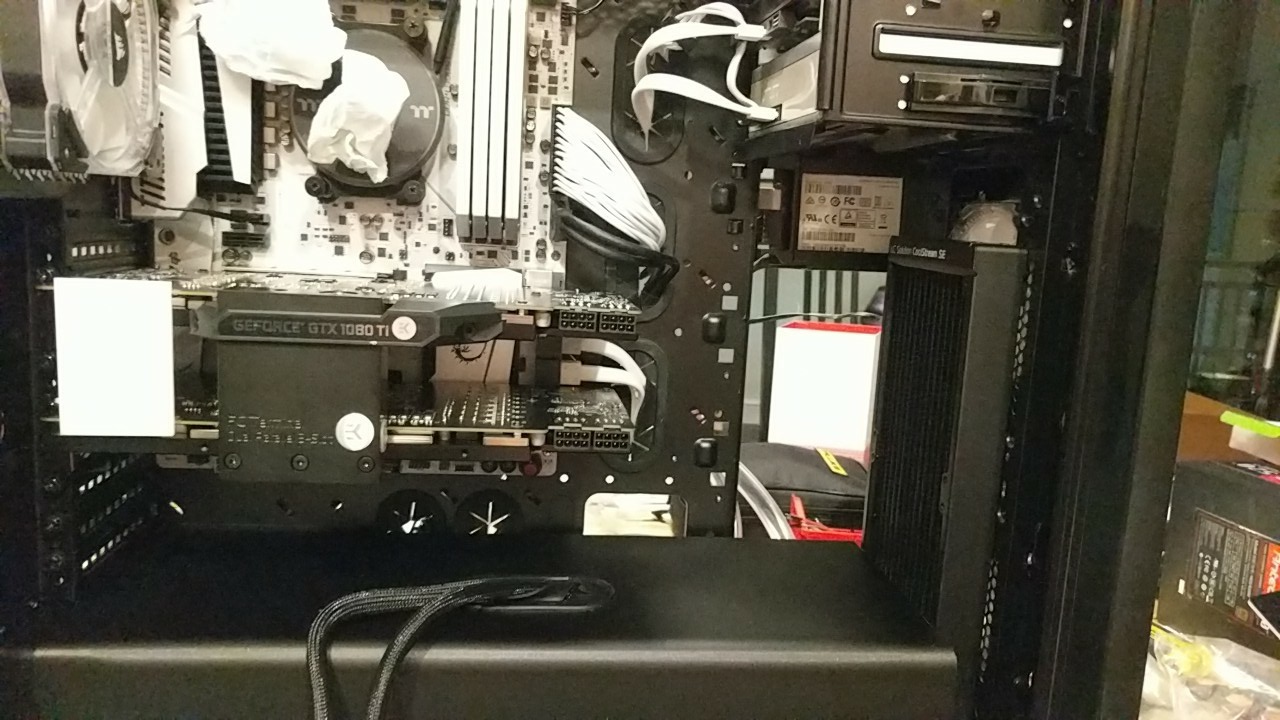
Finally, I plugged everything in, tidied up the cabling, and it was done!
Performance
Even though this build was very stressful, it turned out great! The machine is really powerful. The CPU overclocked to 3.95GHz (can't get 4.0 stable, silicon lottery screwed me) and the RAM is overclocked to 2666. The cards are stock in SLI, but I plan to overclock them one day. They push dual 4k seamlessly.
League of Legends
On 4k with very high settings all around, I get around 180 FPS during menial play, 150 during heavy team-fights.
PUBG
Once again on 4k, with ultra settings everywhere, sans foliage on low and textures on high. FPS is regularly around 90 with occasional dips to 60ish.
That's actually saying a ton, considering how terribly PUBG is optimized. With textures on very high, I occasionally get crashes because it runs out of graphics memory. I have 22-fucking-GB of graphics memory. Like, seriously, guys?
Cinebench
A score of 1558 for CPU and 73.30 for GPU. Keep in mind that these benches were run just now, with a ton of crap open, so they are a bit lower than the potential maximum.
Power Consumption
I've gotten some question about overall power consumption, so here are the results. Luckily I have an RM 1000i, which has Corsair LINK integration.
Sidebar: LibreOffice Calc is the biggest piece of shit on the planet. It literally freezes for up to 20 seconds when resizing a column. I spent 3x as long waiting for it to unfreeze than I did creating these charts, and 2x as long tweaking settings to no avail. Seriously, how can this happen? That's what I get for being cheap, I should probably just buy Office.
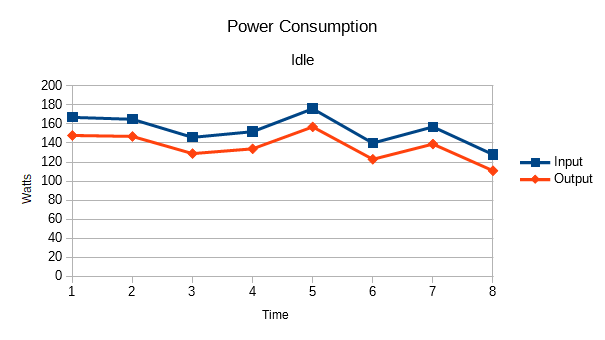
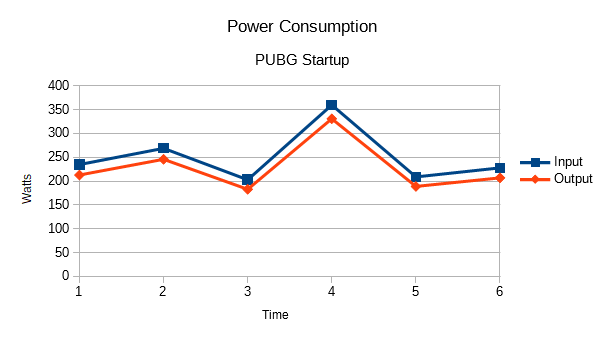
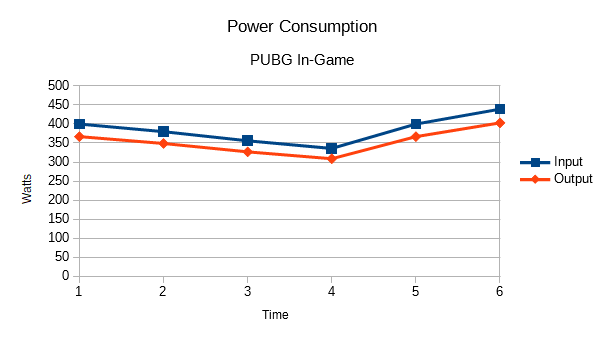
I decided the best way to test power consumption would be to break it into three separate tests: Idle, PUBG Startup, and PUBG In-Game. I figured the three different types of workloads would be enough for a detailed breakdown. I only used about 30 seconds of data from each test, but longer observation indicates this is an accurate enough representation.
Each measurement has two values: the Input wattage and the Output wattage. The former is what is drawn from the outlet, and what you'd be paying for on your power bill. The latter is total sent over the 3.3v, 5v, and 12v lines to the computer components. The difference exists because the supply isn't 100% efficient, and it loses energy through various means (heat, for instance).
Idle
PUBG Startup
PUBG In-Game
Averages
Because the data was neatly packaged by Corsair Link (okay, not that neat, but I was able to Regex it into a .csv), I decided to do some extra processing and generate consumption averages paired with CPU Load, CPU Temp, and temps for both GPUs. This is a watercooling build, after all, so I figured this would be interesting data. I also included Efficiency, which shows that efficiency seemingly increases as draw increases. This is probably only true up to a point, and I can imagine the PSU has a consistent draw where efficiency is optimal.
Note: The PC has been up for about 72 hours, so the cooling loop isn't on a cold start, meaning these temperatures are real-world and not taking advantage of the longer leveling time of watercooling.
| Test | Watts In | Watts Out | Efficiency | Load | CPU | GPU1 | GPU2 |
|---|---|---|---|---|---|---|---|
| Idle | 154 |
136 |
88% |
7% |
53°C |
33°C |
28°C |
| PUBG Startup | 251 |
228 |
91% |
34% |
56°C |
35°C |
28°C |
| PUBG In Game | 385 |
354 |
92% |
36% |
58°C |
40°C |
29°C |
Closing Thoughts
If you have a minute, let me know what you thought of this post in the comments! This is a departure from my regular game hacking and CTF related content, but I'm sure it is still of interest to a lot of people, so I'm trying it out. I do a lot of projects like this--things which aren't necessarily related to software development or hacking, yet still fun and technical--and will definitely go out of my way to blog about them if there's interest!